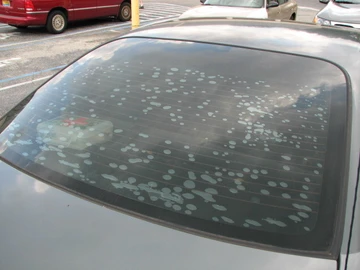
If your looking for the best way to remove old window tint, this first chapter in a 2 part series will point you in the right direction.
Part 1- Removing Tint From Side Windows on a Car

We have all seen it; purple, bubbled up window tint that has definitely seen its better days. In fact, you may have even been unfortunate enough to have suffered through it on your own vehicle. What causes it? How can a person avoid it? And if you do have window tinting that’s gone bad, what can you do to fix it?
If you have been unlucky enough to own a vehicle with failed window tint then you know that it can actually be more than just a nuisance and an eyesore. Seeing out of a bubbled rear window can be challenging and can even be a safety hazard. Anything that obstructs our view of the road, or surroundings is a danger both to ourselves and those around us.

But why does window tinting go bad to begin with? Well put simply, it is all about the film. The truth is not all window tints are created equally. Ceramic Tint, Carbon Tint, like the films that we install here at Fletch Window Tint typically do not fail.
Usually the film that you see on the road is older technology dye based film or metallized window tint. These films do not reject infrared heat and overtime the adhesive system often breaks down. This result is adhesive failure, delamination, and the appearance of those unsightly bubbles. So the best way to avoid it, is simply start with a good quality, lifetime warranty window tint. Saving on the cost up front, often times will cost you later. But what can you do if your tint is already in its last days? Follow these guidelines and you can say goodbye to that purple menace forever.
A Sharp Razor Blade Is Absolutely Required

The first step in tint removal on side windows is to use new sharp razor blades. First of all they will make your job easier, and secondly old rusty blades will make the job much more difficult.
The first thing that you will want to do is begin the removal process by scraping a small corner of the tint so that you can firmly grasp a corner of the tint and start to pull it away from the glass.

If you are lucky, the film will come off in one piece. It might require some force, so you will need a firm grip and a pretty good amount of elbow grease.
If the film rips, simply use a razor blade to lift a corner again and start pulling. Continue this process until each side window has been peeled. You will notice that all, or most of the adhesive is still attached to the glass. This is where those fresh razor blades are going to come in handy.

Next you will want to mix 1/2 ounce of baby shampoo in a spray bottle and thoroughly wet the glass surface with the residual adhesive. Give the solution about 5 minutes to soak and then rewet it.

At this point you will want to start scraping the adhesive with a new fresh razor blade. It is recommended to change the blade frequently during this process. Professional window tinters will often use 3 to 5 razor blades per window. Continue to scrape the window, occasionally rewetting the glass to completely remove all glue. Use caution as you near the edges and bottom of the glass. You will want to use care not to damage the door panels, or rubber gaskets along the sides of the windows.
Once all of the adhesive is removed, completely dry all surfaces with clean paper towels. Baby Shampoo is a mild degreaser, and will sometimes remove built up dirt or even vinyl dressing that has been applied to the door panels. If that happens, simply continue to clean the door panels and reapply the vinyl dressing.
In Part two of this series on how to remove old window tint we will discuss the removal of window tint from rear windows that have defrosters, and the special steps required.
Fletch Window Tint has been in business since 1989 and has installed nearly 2 million square feet of film to date. We are considered the local experts for automotive, residential, and commercial window tinting.
Contact us today to discuss any of your window tinting needs.
